We started Western Building Supply because we were contractors first — and we got tired of suppliers who didn't understand what it's like to actually build something. That background means we think about buildings the way builders do. We've framed walls, set trusses, poured slabs, and made our share of "I wish I'd thought of that sooner" decisions along the way.
So when it comes to barndominiums, we put together the checklist we'd want if we were building our own. Every item on this list is something that's easy to include during construction and painful to add after the fact. Print this one out and hand it to your builder before you break ground.
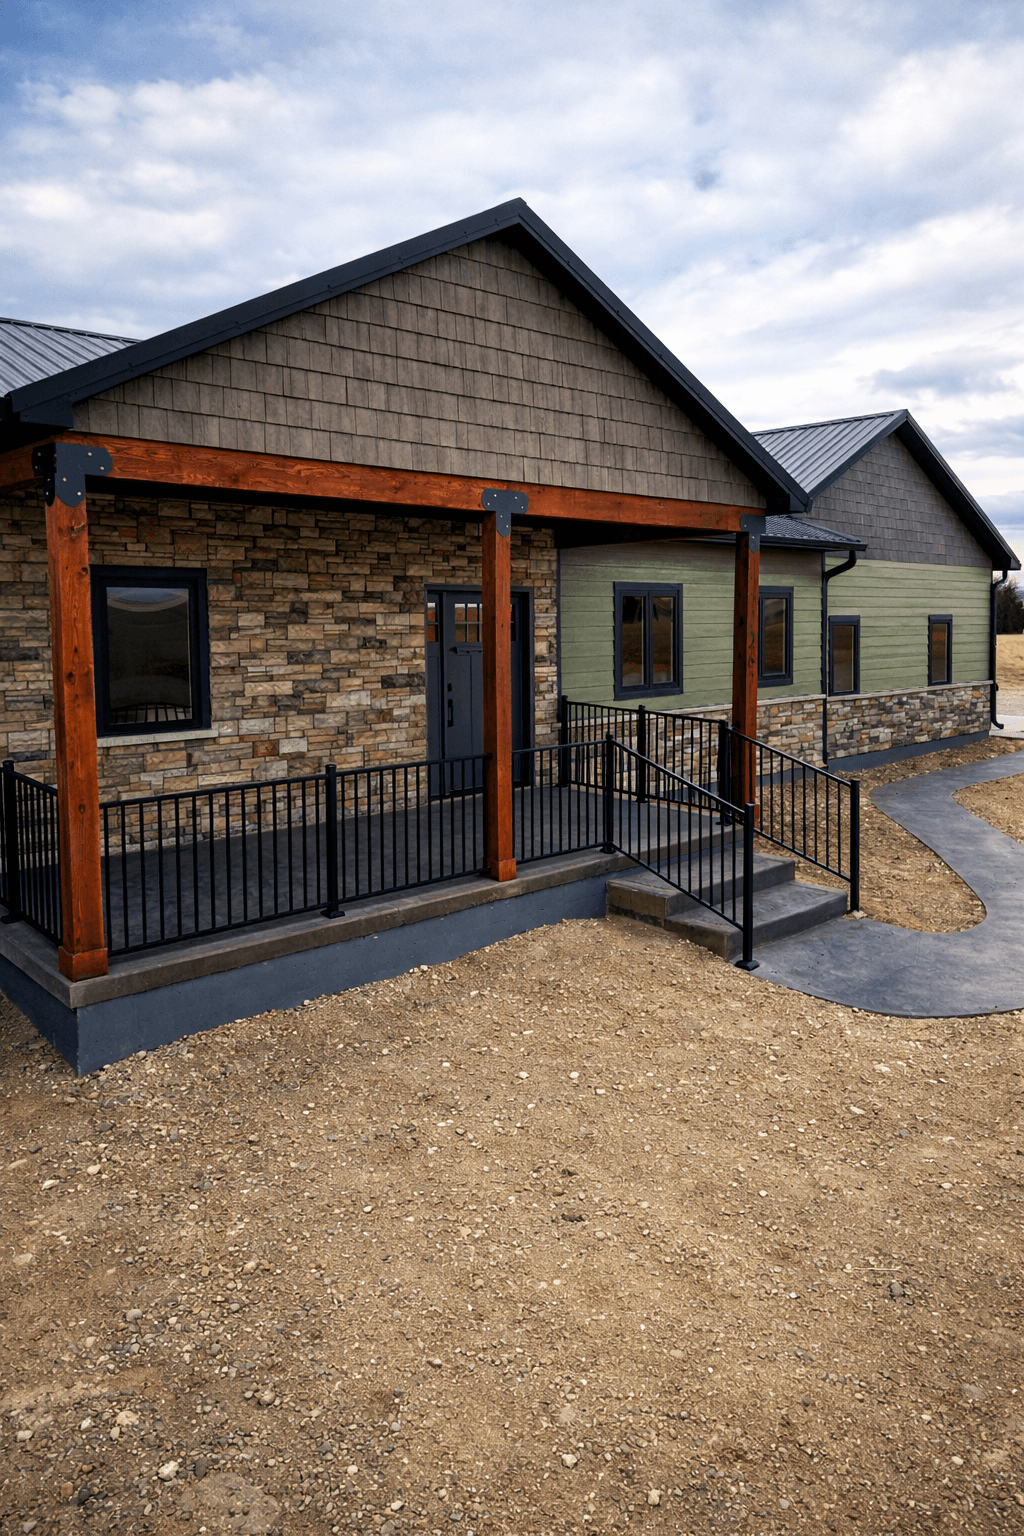
Build Bigger Than You Think You Need
If there's one regret that's universal among barndominium owners, it's this: they wish they'd gone bigger. Bigger garage. Bigger shop. Bigger overall footprint.
Here's the math that matters: the cost difference between, say, a 40x60 and a 40x72 is relatively small compared to the total project. You're already mobilizing crews, pouring concrete, and setting trusses. Adding a couple extra bays at that point is a fraction of what it would cost to add on later. A 60x100 sounds massive until you start filling it — plan for the life you want five years from now, not just what you need today.
The takeaway: Whatever size you're planning, bump it up at least one size. You will never regret having more space. You will absolutely regret not having enough.
Get Your Electrical Right the First Time
Electrical is where the most avoidable regrets live — specifically, not having enough outlets and not putting them in the right places.
More outlets everywhere. Add more than you think you'll ever need. Here are the spots that always get missed:
- Ceiling-height outlets in all four corners of the garage for lights, speakers, and wall-mounted extension cord reels.
- Outlets above kitchen cabinets for holiday lighting and décor — if your cabinets don't go all the way to the ceiling or you have open shelving, you'll want power up there.
- Low outlets on every bathroom wall for plug-in air fresheners, dehumidifiers, and night lights. You don't realize how many things need to be plugged in until you're living in the space.
Run conduit under the slab for the kitchen island. If you want outlets or power in a kitchen island — and you will — that conduit needs to go in before the concrete is poured. Retrofitting it later is a nightmare.
Floor outlets for living areas. When your barndominium has a big open living space, furniture often ends up in the middle of the room, far from any wall. Floor outlets solve the lamp and charger problem before it starts. Plan your furniture layout before the pour so you know where to place them.
Light switch placement matters. This one bites people more than you'd expect — switches ending up on the outside of rooms instead of inside, or in spots that get blocked by the door when it's open. Walk through your floor plan and physically mime walking into every room. Where does your hand naturally reach for a light? That's where the switch goes.
Don't forget the garage light switch. A common miss even with good electricians: putting the garage light switch inside the door, meaning you walk into a dark garage every time. Plan the switch on the outside of the door, or use a motion sensor.
Run antenna and network cable during framing. If you want to cut the cord on cable but still get local channels, run coax for an antenna while the walls are open. Same goes for ethernet. Doing it after drywall is exponentially more difficult and expensive.
Invest in Your Floors
What goes under your feet deserves serious thought during the planning phase, not after. Floors come up in several ways, and the common thread is the same — these are all decisions that live or die at the slab pour.
In-floor radiant heat. Barndominiums with concrete slabs can feel cold underfoot even in moderate weather. Radiant heat is relatively affordable to install during the pour and expensive to impossible to add later. And don't assume you're far enough south to skip it — even owners in Oklahoma and the mid-South wish they'd included it. If you're building anywhere in the northern half of the country, this should be on your list by default.
Stamped concrete. Beautiful look, but understand the maintenance commitment before you commit. Some owners love it; others find it harder to keep clean than they expected. Go in with your eyes open.
Floor drains. Especially in areas where kids, pets, or muddy boots are part of daily life, floor drains are a game-changer. They need to be planned before the slab pour, so this is a day-one decision.
Zero-entry showers require pre-planning. Like floor drains, curbless showers have to be decided before concrete day. If there's even a chance you'll want one, prep the drain during the slab pour. You can always choose a traditional shower later — but you can't go back and re-pour your foundation.
Plan for Safety and Shelter
Anywhere severe weather is a possibility — and out West, that's a lot of places — storm shelters and safe rooms deserve a spot on the planning list.
Storm shelter or safe room. This is one of those features that feels optional right up until the moment you need it. The problem is that it's dramatically easier to build into the original construction than to add later. Above-ground steel shelters can be installed inside a garage corner or master closet, anchored to rebar-supported concrete. Whether you go with a reinforced interior closet or a standalone steel unit, the key is planning it into your build from the start. The cost is a fraction of the total project.
Builders who don't plan for it often end up with an outdoor shelter bolted to the side of the building — which works, but nobody wants to run outside during a storm to get to safety.
Secure storage or vault room. Whether it's firearms, important documents, or valuables, a secure room is much easier to incorporate during construction than after. The framing and concrete stages are where this decision lives — reinforced walls and concealed access points need to be planned before drywall goes up.
The Roof Over Your Head
Two roofing decisions come up consistently that are worth paying attention to.
Standing seam metal roofing over the living area. Standard R-panels work great for shops and agricultural buildings, but for the living portion of a barndominium, standing seam is virtually leak-proof. It's an expensive upgrade, but it's almost impossible for it to leak. For the area above your living space — where a leak means ceiling damage, mold risk, and repair bills — the upgrade is worth serious consideration.
Attic trusses designed for what you actually need up there. Standard roof trusses fill the attic with webbing — no room to walk, let alone store anything. But attic trusses are a different animal. They're engineered with an open center cavity that gives you a real, usable room inside the truss profile. And here's what most people don't realize: attic trusses can be designed to handle pretty much any load you want to put up there. Storage, HVAC equipment, water heaters, mechanical systems — if you tell your truss designer what's going up in that space, they can engineer for it.
This is one of the smartest ways to buy back square footage in your barndominium. Every mechanical system or storage area you move into the attic is floor space you get to use for living. But the key word is design — you have to have this conversation before the trusses are built. Once standard trusses are set, that attic space is gone.
Insulation and Moisture Control
This one deserves its own section because getting it wrong can cause serious, expensive problems.
Metal buildings behave differently than traditional stick-frame construction when it comes to moisture. The steel skin creates a vapor barrier on the outside, and if the insulation strategy doesn't account for that, you can end up trapping moisture inside the wall and ceiling cavities. The result is humidity levels that stay stubbornly high even with a dehumidifier running, mold and mildew showing up as dark stripes on the ceiling where studs run behind the sheetrock, and spots forming around nail heads. It looks like a roof leak, but it's not — it's a condensation issue caused by the wrong insulation approach.
This is exactly the kind of problem that's preventable during construction but very expensive to fix after the fact.
The takeaway: Don't just insulate your barndominium — insulate it correctly for a metal building. Research closed-cell spray foam, proper vapor barrier placement, and ventilation strategies specific to post-frame and steel-frame construction. This isn't somewhere to cut corners.
Smart Storage and Utility Spaces
The small, practical spaces inside a barndominium are the ones that make the biggest difference in daily life — and the ones most often left off the plans.
Broom and vacuum closet in the laundry room. Sounds minor. It's not. A dedicated closet for cleaning supplies, brooms, and vacuums — even if it's built into a water heater closet — makes daily life dramatically better. Pro tip: put an outlet inside to charge a cordless vacuum. Or go all-in with a central vacuum system — a unit mounted in the garage with wall ports throughout the house. Owners who install them almost universally love them.
Washer and dryer in the master closet and a separate laundry room. This one surprises people, but it's one of the highest-satisfaction features in barndominium builds. A small stackable set in or near the master closet for personal laundry, plus a full laundry room for everything else. It sounds excessive until you live with it — then you wonder why every house isn't built this way.
Mudroom with everything in it. If your barndominium has a shop and living space under one roof, the mudroom is the most important room in the building. It's the buffer between work mess and home life. The best mudroom designs include a sink, storage, boot bench, and pet wash station — with usable space above it for an office or even a small apartment. Think of it as the transition zone that keeps your house clean.
Climate-controlled storage room. In areas with extreme temperature swings — which is most of the West — a climate-controlled storage room protects belongings that can't handle heat, cold, or humidity. Easy to frame in during the build, expensive to add later.
Bathroom and Kitchen Details
The small details in kitchens and bathrooms are where avoidable frustration lives.
Heated bathroom mirrors. A heated mirror defogger is a sticky heating pad that attaches to the back of any mirror and wires to your shower light circuit. No more foggy mirrors after a shower. It's a cheap upgrade, but the wiring is much easier to plan during rough-in than to retrofit later.
Centrally located water heater. In a barndominium with a big footprint, hot water travel distance is a real consideration. Putting the water heater in the center of the house eliminates that five-minute wait for hot water in distant bathrooms. A central location — or a tankless recirculation system — solves it.
Shower size and enclosure. Open showers are trendy but can be drafty, especially in a barndominium where air moves differently than in a traditional house. If you go big on shower size, consider an enclosed design with a glass door to keep the heat in.
Outdoor and Structural Features
A few outdoor and structural decisions round out the list.
Outdoor balcony off the master bedroom. Simple, but what a quality-of-life feature — especially when you've got a view worth looking at. This needs to be planned structurally, so it's not something you can easily add later.
Wrap-around porch trade-offs. If you've got wide open acreage, build the porch of your dreams — no trade-off required. But if you're working with a limited footprint or a fixed building size, understand that porch square footage comes from somewhere. Skipping a side porch might give you enough interior space for two additional bedrooms. When space is tight, make that trade-off intentionally, not accidentally.
Property lighting away from the house. Exterior lighting that illuminates the property — not just the front door — is easy to forget and hard to run wire for after the fact. Plan it during the electrical rough-in.
Pocket doors. They save space, look clean, and work especially well in barndominiums where open floor plans can make traditional door swings awkward.
Pet washing station. If you have dogs, a dedicated wash station in the mudroom or utility area is a game-changer that costs very little to plumb during construction.
Handicap accessibility. Even if you don't need it now, building with wider doorways, zero-threshold entries, and accessible bathroom layouts from the start is dramatically easier and cheaper than retrofitting. You're building your forever home — plan for the life you'll have in 20 years too.
The One Piece of Advice That Ties It All Together
If we could give one single piece of advice to every barndominium builder, it would be this: finish the build before you move in.
We get it — the temptation to move in as soon as it's livable and finish "later" is strong. But every single item on this list has something in common: it's something that should be planned or installed during the build, not after.
The best time to add floor drains, run conduit, install radiant heat, frame a safe room, or wire extra outlets is when the walls are open, the slab hasn't been poured, or the crew is already on site. The second-best time is... well, there isn't really a second-best time. There's just "expensive and disruptive."
Your Build Planning Checklist
Before you break ground, make sure you've at least discussed every item on this list with your builder:
- Building size — have you considered going one size up?
- Outlet plan — garage, kitchen, bathroom, living room floors, above cabinets
- Conduit under slab — kitchen island, floor outlets, shower drains
- Light switch placement — walk through every room in your mind
- In-floor radiant heat
- Floor drains — utility areas, mudroom, pet areas
- Storm shelter or safe room
- Insulation strategy specific to metal building construction
- Standing seam roofing over living areas
- Attic truss design for storage access
- Broom/vacuum closet with charging outlet
- Washer/dryer in master closet
- Mudroom design — the transition between shop and living space
- Heated bathroom mirror wiring
- Water heater location
- Antenna/cable/network cable rough-in
- Cabinet review before installation
- Outdoor lighting plan
- Porch vs. interior square footage trade-offs
- Handicap accessibility
- Secure storage or safe room
- Complete the build before moving in
At Western Building Supply, we were contractors before we were suppliers — and that makes all the difference. We manufacture custom trusses, steel roofing and siding, and laminated columns in Wheatland, Wyoming, serving professional contractors across 11 western states. Before your first conversation with a builder, check our barndominium materials guide so you know exactly what a post-frame kit includes and what you'll need to source separately. Then give us a call — we'll make sure nothing on this list catches you by surprise.